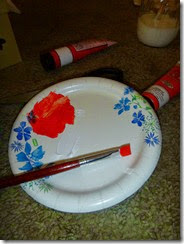
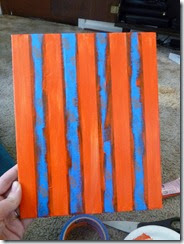
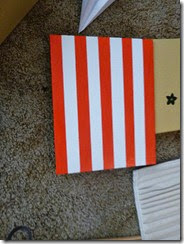
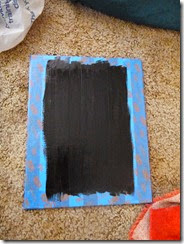
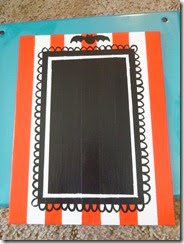
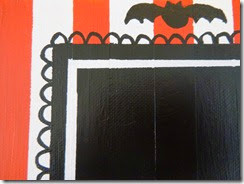
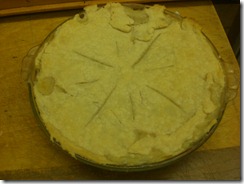
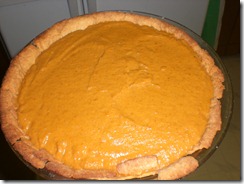
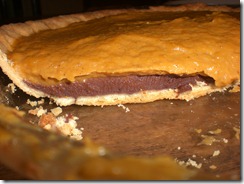
I have been cooking like crazy, but I have not taken a single picture. After we make this move, I promise to be better. I have managed to document one project though. You can figure it out based on the pictures…and I failed to document every step of this, so if you have questions, feel free to ask.
The Concepts of My Cooking (and Crafting) Prowess
Saturday, July 12, 2014
Friday, November 1, 2013
Halloween Cupcakes!
Tuesday, August 28, 2012
Pinterest-a-thon
So a friend of mine came up with a challenge: actually TRY some of the brilliant ideas we pin! So I accepted the challenge: do ten things you pinned before September. Well, I’ve done two things so far. Well, I’m sure I’ve done more, but never bothered to check it out. :) Okay, so here are the two I have bother to document.
Pinterest 1 out of 10:
Pumpkin Cupcakes. Here’s the pin. I’ve actually made these twice. Once as regular sized cupcakes, and once as mini-cupcakes. Both delicious!
Pinterest 2 out of 10:
Nutella cookies. I’d give you the pin, but my computer couldn’t pull up the link, so I’ll just tell you about it.
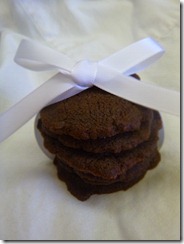 So mine are gluten-free because I had some rice flour I needed to use up, but you can use regular flour. Basically you mix a cup of nutella, a cup of flour and an egg together. Roll the cookies into balls and squash down with your palm (it makes them a little thicker than if you smush them with the bottom of a glass). Bake at 350 for 6-7 minutes, and bada-bing, bada-boom: COOKIES! I even mixed some peanut butter into the last half of the batch. I’m a BIGGER fan of the peanut-butter-nutella cookies. Jake is so-so about both of them.
Saturday, July 7, 2012
Peaches and Cream Cookies
Recipe comes courtesy of The Ultimate Shortcut Cookie Book by Camilla V. Saulsbury
Cookie Ingredients:
1 (18.25-ounce) package vanilla cake mix (I used a 16.5 pkg of white cake)
1/2 cup vegetable oil
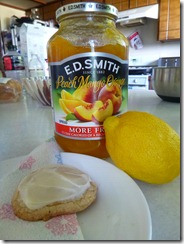
1/2 cup peach preserves (I didn’t have peach; I had Peach-Mango-Orange preserves)
1 tablespoon grated lemon zest
1 large egg
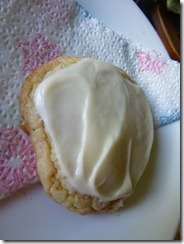
1 recipe Cream Cheese Frosting (Ingredients below)
Cream Cheese Frosting:
6 oz cream cheese, softened
1/4 cup (1/2 stick) butter, softened
1 tsp vanilla extract
2 1/4 cups powdered sugar, sifted (I didn’t sift…no biggie)
Cookie Directions:
- Preheat oven to 350. Position oven rack in upper third of the oven. Spray cookie sheets with nonstick cooking spray.
- Place half of the cake mix in a large mixing bowl along with the oil, preserves, lemon zest, and egg. blend with an electric mixer set on medium-high speed for 1-2 minutes until smooth. stir in the remaining cake mix with a wooden spoon until all dry ingredients are moistened.
- Drop dough by teaspoonfuls, 2 inches apart, onto prepared cookie sheets.
- Bake for 11-13 minutes or until set at edges and just golden brown. Cool for 1 minute on the cookie sheets. Transfer to wire racks with metal spatula and cool completely. Frost cookies.
Frosting Directions:
- Beat the cream cheese, butter, and vanilla in a medium bowl until smooth. Gradually add powdered sugar, beating until incorporated and smooth.
Saturday, March 17, 2012
Homemade [White]fish Crackers
The main recipe came from: Miss Anthropist’s Kitchen.
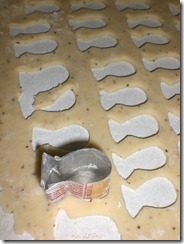
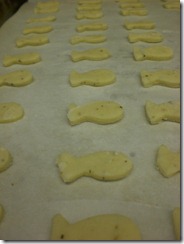
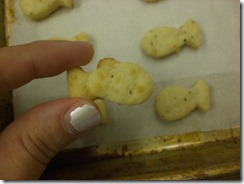
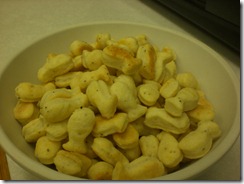
I did everything from making my own cookie cutter to rolling out that dough multiple times to get as many fishy crackers as I could. Jake and I completely agree: these are so good, we’re never going back to those orange fish!
Ingredients:
1 cup(s) all-purpose flour
4 tablespoon(s) cold unsalted butter, cut into small pieces
8 ounce(s) grated “Insert-your-favorite-cheese-here” [roughly two cups] (We did Monterey-Jack)
3/4 teaspoon(s) salt
1/2 teaspoon(s) fresh-ground pepper
1 teaspoon baking powder
+ water (the amount depends on your preference)
Directions:
- Basically all you need to do is mix together all the ingredients together (the original recipe says to put it in a food processor, but we don’t have one so I just stuck all the ingredients in my mother-in-law’s Kitchenaid—I’m in love!—and it worked great). First mix in the dry ingredients together, and then throw in the butter and cheese.
- When the mixture looks like a coarse meal, add in—a tablespoon at a time—water until the dough all sticks together. Roll the dough into a ball and refrigerate for at least half an hour—I stuck it in the freezer for 35 minutes, and then for 10 in the fridge.
- Roll them out and cut out as many little fishies as you can. Bake at 350 (on parchment paper) for 13-18 minutes. If I remember right, we baked ours for 15ish minutes. Just bake them until their golden brown. You can store them for up to a week in a airtight container. They get more crunchy the next day. :) Delish.
Wednesday, March 14, 2012
Happiness is π (Chicken pot & Chocolate-Bottom Pumpkin to be specific)
First and foremost, I recently recognized that I’ve been the worst English Major ever on this blog because not once have a cited a single source. So, starting here and now, I’m citing all my sources (pinky-swear!).
Chicken Pot Pie
from Let’s Bake: The Robin Hood ‘No Sift’ Way
Ingredients:
Chicken Pot Pie Filling
3 cups cooked chicken
1 1/2 cup diced cooked potatoes
1 cup sliced cooked carrots
1/2 cup cooked peas
2 tbsp finely chopped onion
1/4 cup butter
5 tbsp All-Purpose Flour
2 1/2 cup chicken stock
1 tsp salt
1/8 tsp pepper
Crust (Single Crust Plain Pastry)
1 cup All-Purpose Flour
1/2 tsp salt
6 tbsp shortening
2-3 tbsp cold water
Directions:
- Combine chicken and vegetables in well-greased 1 1/2-quart casserole (I just used a pie pan; I usually make a double batch since we LOVE our pie!)
- Melt butter in saucepan.
- Add flour (not sifted), salt and pepper. Mix well.
- Add chicken stock gradually. Stir constantly.
- Cook over medium heat until mixture thickens. Stir constantly.
- Pour over chicken and vegetables.
CRUST
- Spoon flour (not sifted) into dry measuring cup. Level off and pour measured flour into bowl.
- Add salt to flour (not sifted). stir to blend.
- Cut in half or shortening until mixture resembles coarse meal, then remaining shortening until particles are the size of small peas.
- Add water a little at a time, mixing lightly with a fork.
- Shape dough into firm ball with hands.
- Roll out to 12-inch circle on lightly floured cloth-covered board.
- Trim edge with decorative cutter and float pastry on chicken mixture or place pastry over chicken mixture and trim 1 inch wider than casserole (or pie pan).
- Cut slits in top for steam to escape.
- Bake at 425 for 25-30 minutes.
No-Bake Chocolate-Bottom Pumpkin Tart (Not technically a pie, but still baked in a pie pan)
from The Unofficial Harry Potter Cookbook by Dinah Bucholz
Ingredients:
Tart Dough
1 cup call-purpose flour
1/8 tsp salt
3 tbsp granulated sugar
3/4 stick (6 tbsp) cold butter, cut into pieces
1 large egg yolk
2 tbsp heavy cream
1 tsp vanilla
Chocolate Bottom
1/2 cup heavy cream
4 oz bittersweet chocolate (8 tbsp chocolate chips)
Pumpkin Filling
1 1/2 cup canned pumpkin (NOT pumpkin pie filling)
1/2 cup granulated sugar
1/2 tsp ground cinnamon
1/8 tsp ground allspice
1/8 tsp ground cloves
1/8 tsp ground nutmeg
1/2 cup heavy cream
2 large eggs
1 tbsp cornstarch
1 1/2 oz bittersweet chocolate, melted, for drizzling, optional (We skipped the chocolate—crazy, I know—and made whipped![]() cream out of the left over heavy cream, i just added powered sugar and vanilla to taste, then whip, whip, whipped!)
cream out of the left over heavy cream, i just added powered sugar and vanilla to taste, then whip, whip, whipped!)
Directions:
TART
- Place flour, salt and sugar in the bowl of a food processor (or kitchenaid, or just beat it!) and pulse a few times to combine. Scatter the butter pieces over the flour and pulse about 15 times until the mixture resembles coarse yellow meal. Transfer the mixture to a large mixing bowl.
- Whisk together the egg yolk, cream, and vanilla and pour over the flour mixture. Toss with a rubber spatula until the dough begins to stick together. Knead very briefly to form a cohesive mass and form into a disk. Wrap in plastic wrap and refrigerate 2 hours or up to 3 days.
- Preheat oven to 425. On a generously floured surface (and with a generously floured roller), roll out disk—top the disk with flour—to an 11-inch circle. Tart dough is hard to roll out, but this is a very forgiving dough, especially if your use margarine instead of butter. Simply gather up the torn dough, re-flour the work surface, briefly kneed the dough into a ball, and roll it out again. Fit the dough into a 9-inch tart (or pie) pan. If the dough breaks, you can patch it by gluing extra scraps with a bit of water. Prick the bottom of the shell with a fork, line with aluminum foil, and fill with beans or pie weights (if you don’t have either, stick another pan in; just be SUPER careful when taking it out. I broke mine a little bit.). Bake for 20 minutes or until the dough is dry and set. Remove the foil (CAREFULLY!!) and weights, reduce heat to 350, and bake another 7 to 10 minutes until the crust is golden brown. Remove from the oven to cool.
CHOCOLATE BOTTOM
- Place chocolate and cream in a microwave-safe bowl and microwave on high for 2 minutes, stopping to stir every 30 seconds. Stir until smooth and pour into the bottom of the tart shell. Cool until set (Stick it in the fridge).
PUMPKIN FILLING
- Combine pumpkin, sugar, spices, and heavy cream (no we’re not making little girls) in a medium saucepan and cook, stirring frequently, until hot but not bubbly (I had to keep testing it with my finger to see when it was hot). Whisk the eggs with the cornstarch and add to the pan. Continue cooking, stirring constantly, until thickened and bubbling. Remove from heat. Cool to room temperature.
- Pour the cooled filling into the tart shell and smooth the top with a rubber spatula. if desired, drizzle melted chocolate on top. Refrigerate until firm. Serve with whipped cream!
Notes: We love any excuse to eat pie; like π day (3.14)!
Thursday, February 9, 2012
DIY: Easy Storage for Old [and New] Vinyl Records
Ok, so I know that this was originally intended to be a cooking blog, but I’ve been inspired by Pinterest (seriously, I’m going to have to start attending PA [Pin-aholics Anonymous] meetings, I am that addicted!), and I’ve realized that I have “crafting” on the brain. Jake and I are currently living with his dad, so we don’t have much storage space in our room. Because of this, I’ve decided to get creative in terms of storage. :) Oh yes. But first things first:
I, Danica, hereby dub this blog … well ok, so I haven’t really thought of a name yet, but when I think of one I’ll let you know… so for now, I dub that this blog is about more than just cooking.
SO! Now for the fun part.
If you have any vinyls that you can’t seem to throw away (or found some that you couldn’t live without), but have no place to store them that isn’t a box hidden away in a dark storage shed? Here is your problem solved! [truthfully, my hubby came up with this idea, I just thought it was incredibly clever]. Pin them up on your wall!
All you need are thumb tacks.
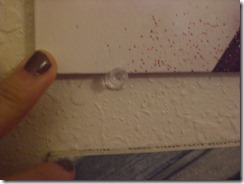 Put two tacks underneath the record case (each one about an inch in from the corner), and then set the record so it rests between the head of the tack and the part that’s in the wall (the grooved part).
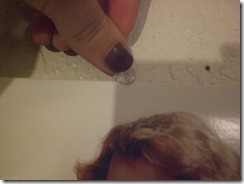 Line the third tack in the middle of the top of your record; BEFORE you push it into the wall, pull your record case a little (so it’s leaning towards you), and place the grooved part of the pin on the case. Push the pin and record into the wall. If you were to take a piece of yarn and line your tacks with them, the yarn should form a triangle (point on top, base on bottom).
Presto-Changeo; a useless mess to art…sort of :)
